Custom Textures 3

Obtaining New Textures By "Cloning"

This third tutorial on the subject of Photoshop® textures shows how to take advantage of the Texturizer Filter by "cloning" the texture qualities from one image and applying them to another.

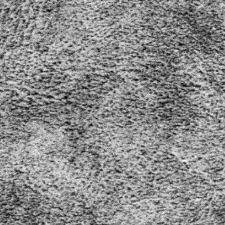
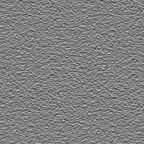
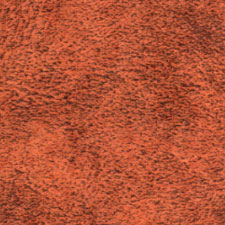
1. The image on the left below was scanned into the computer as an RGB image. The scan was made of a common stationery "accordion file" which was selected because of the simulated leather pattern printed on it. When choosing images for textures, pick ones with a broad enough range of grayscale pixel values. This will give your textures depth and dimension.

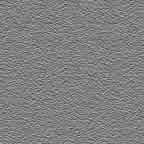
2. The image on the right below is was created by saving the scanned image as a new Photoshop .PSD file then converting it into a grayscale image with the command:

Image > Mode > Grayscale

It is not necessary that the image be saved in grayscale mode. But since Photoshop only uses the grayscale information in the image, it uses less disk space than a color image. You may want to do this tutorial on your own computer and use this image in your own texture library. If you are using Netscape® or Internet Explorer, simply right click on the grayscale image below and save it to disk. Then open the image in Photoshop and save it as a Photoshop .PSD file.

The new file can be stored in the same folder with other Photoshop texture files (described in a previous texture tutorial). It is this file you will be loading and applying to images with the Texturizer Filter.

Original Scanned Image:
leather1.jpg
Grayscale Image of Original Scan:
leather2.gif

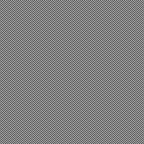
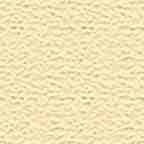
3. Once you have saved the texture file as a grayscale Photoshop .PSD file you are ready to apply the texture to an image. Make a new RGB image at 72 pixels per inch. The image below is 256 pixels square. Click the foreground color square in the color palette and set the color values to R=199, G=159 and B=109 (it is one of the colors on the default swatches palette in Photoshop). Next click the bucket tool and flood fill the image with the foreground color.

leather3.gif

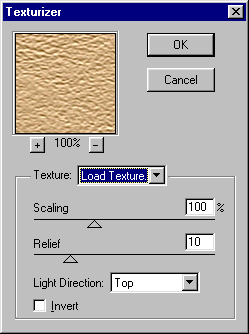
4. Now comes the real magic. Issue the command:

Filter > Texture > Texturizer > Load Texture

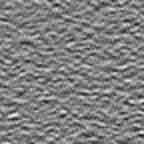
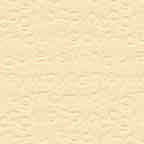
Then load the .PSD file saved in step 2 above. In this example set Scaling=100, Relief=10 and the Light Direction=Top. Click "OK" to close the dialog and apply the texture to the image.
leather4.gif

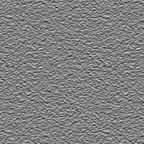
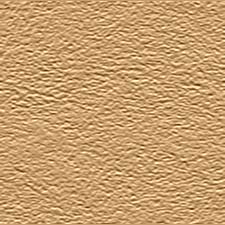
5. The result is a dazzling effect on a mono-colored tile that can now be used as a background or fill. You can apply this texture to any image, not just to background tiles or fills.
leather5.jpg

Custom Textures 2

Customizing The Sandstone Texture

This second tutorial on the subject of custom textures shows how to take further advantage of the use of custom textures via the command:

Filter > Texture > Texturizer > Load Texture

Creating a new adjusted texture from a default texture is the topic of this tutorial. You may ask, "Why would I need to adjust a default texture provided by Photoshop® ?" The images below illustrate the point:

pitbull1.jpg pitbull2.jpg

Both images have the sandstone texture applied to their backgrounds. However both images have custom textures applied. The image on the left has a more coarse version of the sandstone texture and the image on the right has a finer version. Short of making your own custom textures there is only one way to accomplish the above effect:

Resample the image up then apply the default texture for a more fine appearance, or...
Resample the image down then apply the default texture for a more coarse appearance.

postit.gif Note: Although the filter has a "Scaling" feature which allows you to vary the coarseness of the texture, this tutorial provides a means to vary the texture outside the limits of the scaling range.

It is undesirable to resample the image, then apply the texture, then resample the image again to its original size because the image will lose data in the process. So here is how you do it.

1. For this exercise we will make two RGB images each having a resolution of 72 pixels per inch. Make one 2" x 2" and one 8" x 8":

2" x 2"
blank1.gif

2. Set the foreground color to a medium gray (Red=128, Green=128 and Blue=128), then flood fill both images with the medium gray foreground color. Next apply the default sandstone texture to each image:

Filter > Texture > Texturizer > Sandstone

Then select:

Scaling=100%
Relief=7
Light Direction=Top

Then Click "OK".

3. Next duplicate the 8" x 8" image twice with the command:

Image > Duplicate

4. You now have three 8" x 8" images and one 2" x 2" image each filled with the same texture. Maintain a resolution of 72 pixels per inch and resample each image according to the following::

2" x 2" - resample to 4" x 4"...makes the coarse texture
8" x 8" - resample to 6" x 6"...makes a fine texture
8" x 8" - resample to 5" x 5"...makes a extra fine texture
8" x 8" - resample to 4" x 4"...makes an super fine texture

The finished textures are shown below:

Coarse
sandstn1.jpg
Fine
sandstn2.jpg

Extra Fine
sandstn3.jpg

Super Fine
sandstn4.jpg

5. Name the image files:

SANDSTN1.PSD (Coarse)
SANDSTN2.PSD (Fine)
SANDSTN3.PSD (Extra Fine)
SANDSTN4.PSD (Super Fine)

6. To apply the new textures to an image click:

Filter > Texture > Texturizer > Load Texture

Load either SANDSTN1.PSD, SANDSTN2.PSD, SANDSTN3.PSD or SANDSTN4.PSD. You can then apply any of the filter settings as you normally would using the default sandstone texture.

Custom Textures 1

Obtaining Textures For Your Images

This first tutorial on the subject of textures illustrates how to take advantage of a feature in Photoshop® that allows the loading of textures via the command:

Filter > Texture > Texturizer > Load Texture

Before you can load any textures, you have to obtain them or create them. Adobe includes several textures on the Photoshop Application CD-ROM disk. In the GOODIES folder on the CD there is a sub-folder called TEXTURES. Simply drag and drop this folder onto your hard disk. You may put it in the Photoshop application folder, but this is not required.

Textures are simply Photoshop grayscale .PSD files from which the texture information is applied with the above filter. It is not required that the image be saved in grayscale format. The texture can just as well be saved in color although Photoshop only uses the grayscale data in the file. There is an advantage to saving it in grayscale format to save disk space.

Because these texture files are simply grayscale images, this offers great flexibility in obtaining and/or cloning them. One great source for textures is Paint Shop Pro™ 5.0. If you accepted the default folders during the installation of Paint Shop Pro 5.0 on your system there will be a folder:

C:\Program Files\Paint Shop Pro 5\Papers

In this folder are paper texture files with the file extension .TEX. Open the files in Paint Shop Pro 5 and save them as .PSD files. You can then apply these textures on Photoshop images in the same manner as the ones supplied with Photoshop.

The following background tiles were all made very rapidly in Photoshop by applying the texture filter using the "Load Texture" option. The textures were made from .PSD files using the Paint Shop Pro 5 .TEX files located in the "Papers" folder.

Background Tiles For Web Pages

To download in Windows®: Right click image and select "Save Image As..."
To download in Mac®: Drag image onto the Desktop
color010.jpg color011.jpg color012.jpg
color013.jpg color014.jpg color015.jpg
color016.jpg color017.jpg color018.jpg
color019.jpg color020.jpg color021.jpg

The tiles were all made by duplicating a single file with a uniform color background. To make these yourself click:

File > New

Make a new 2" x 2" RGB image at 72 pixels per inch. Click the foreground color square in the color palette and set the color values to R=247, G=228 and B=186. Then click the bucket tool and flood fill the image with the new color. Save the file in JPEG format. Duplicate the file as many times as you want with the command:

Image > Duplicate

Then apply a texture to each image with the command:

Filter > Texture > Texturizer > Load Texture

Then select from the .PSD texture files on your hard disk.