One-Pixel Brush

Here's a quick and easy tip for Photoshop. Have you ever wanted to erase one pixel at a time and chose the smallest hard-edged brush, only to find that you were getting soft edges in the surrounding pixels? When you're working with really small images like icons, what you need is a one-pixel brush. It is very easy to make.

1. First, create a new image. Then use the Rectangular Marquee Tool and drag out a one-pixel square selection.

2. Flood fill it with black...

3. Don't deselect anything yet...

4. Next click the small triangle in the upper right corner of the Brushes Palette to access the options menu. Choose "Define Brush" from the menu.

5. Photoshop adds a new brush to the palette. Double-click on the new brush to access the brush options dialog.

6. Photoshop will anti-alias new brushes by default. Un-check the "Anti-aliased" checkbox.

7. To test your new brush, choose the Eraser Tool in the toolbox.

8. I like to set my painting brush cursors to the brush size. To do this click File > Preferences > Display & Cursors and select "Brush Size" from the Painting Cursors section. Position the brush over a pixel...

9. Click to erase. It leaves no fuzzy edges.

Tiling Textures 2

Making Seamless Tiles or Pattern Fills

The previous tutorial covered how to make uniform background tiles and fills. This tutorial shows how to make them mate together seamlessly. When you first create an image it doesn't necessarily mate seamlessly together when it is used as a background tile on a web page or as a pattern fill in Photoshop®. You have to edit the edges in a way that they blend together seamlessly when the image is used as a tile.

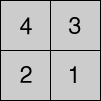
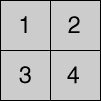
1. The way to do this is to divide the image into 4 equal sections, rearrange them, edit the edges then reassemble them into their original positions. Figure 1 below represents how an image is to be divided into 4 equal sections. Figure 2 shows how to rearrange them for editing:

Figure 1
grnbk01.gif
Figure 2

grnbk02.gif

Adobe has provided the Offset filter in Photoshop which handles all the steps of dividing the image into sections, rearranging them, then reassembling them into their original positions.

2. The first most obvious requirement, then, would be to make the image with an even number of pixels in both width and height. This way you can divide the image into 4 equal sections. For this tutorial we will start by making a new RGB image 100 x 100 pixels at 72 pixels per inch. Save the new image as "GREENBK.PSD" Set the foreground color to R=73 G=125 B=128. Using the bucket tool bucket1.gif flood fill the image with the foreground color:

postit.gif Note: The images in this tutorial will be displayed twice their normal size for clarity.

grnbk03.gif


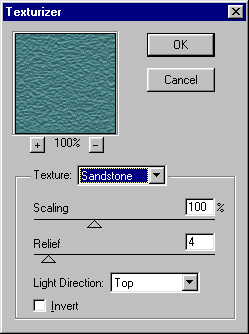
3. Next apply the texturizer filter by clicking:

Filter > Texture > Texturizer > Sandstone

Then select:

Scaling=100%
Relief=4
Light Direction=Top

Then Click "OK".
grnbk04.gif


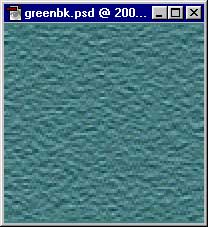
4. This gives you a raw fill. It may or may not tile seamlessly.
grnbk05.jpg


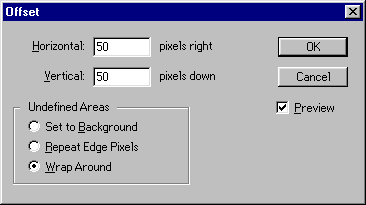
5. Next apply the Offset filter by clicking:

Filter > Other > Offset...

Then select:

Horizontal=50
Vertical=50

Wrap Around

Then click "OK"
grnbk06.gif


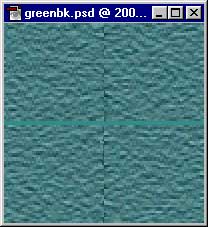
6. You can now see how the edges will mate when the image is used as a tile. The seams will show up in the horizontal and vertical centers of the image:
grnbk07.jpg

7. Select the Rubber Stamp Tool stmptool.gif (the cloning stamp) and a small, smooth brush from the brushes palette. Next select a uniform area of the image as a source point to clone from. Then with short, quick clicks carefully blend the horizontal and vertical centers to smooth away the hard edges. Take care to avoid the outside edges of the image so as not to upset these areas when the image is reassembled:
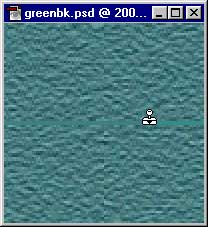
grnbk08.jpg


8. Now reapply the Offset filter by clicking Ctrl-F, or with the menu commands:

Filter > Other > Offset...

This will reverse the first application of the filter and reassemble the image into its original order:
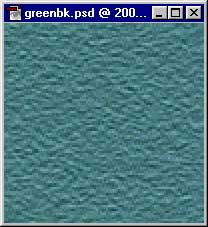
grnbk09.jpg


9. Now it would be wise to test the tile using the same technique as the previous tutorial. With GREENBK.PSD still active, click Ctrl-A to "Select All", then:

Edit > Define Pattern

Next make a new RGB image 800 x 800 pixels at 72 pixels per inch. Then click:

Edit > Fill

Select:

Contents:
Use=Pattern

Blending:
Opacity=100%,
Mode=Normal.

Then click "OK" to apply the pattern fill to the image. You will be able to see if the image tiles seamlessly or not. When you are finished with the test you can discard the new 800 x 800 image.

10. The finished background texture is shown below at normal size:
grnbk10.jpg

Tiling Textures 1

Giving a Texture or Fill a Uniform Appearance

Tiles are used as background images on web pages. Tiles are also used as wallpaper in Microsoft® Windows®. Pattern Fills are used in Photoshop® image editing as a means to fill an area in an image. The following guidelines should be followed in order to achieve a good result.

When making background tiles or fills, care should be taken so that...

A. The overall appearance is uniform when the image used as a background tile or fill, and...

B. The edges of the tiles mate seamlessly together.

This tutorial covers one way to achieve A above. The next tutorial addresses B.

Making a background tile using the sandstone texture (applied with the Texturizer Filter) is very popular and is a good example of the use of this technique.

1. Start by making a 4" x 4" RGB image at 72 pixels per inch with a white background. Save the file as TILE01.PSD or other name. Pick a color from the swatches palette that appeals to you and set it as the foreground color. By moving the mouse over the swatches, the cursor turns into an eyedropper. Simply clicking the mouse on any color swatch will set the foreground color to the one you pick.

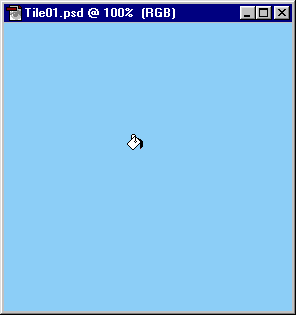
2. Next use the bucket tool and click anywhere in the image area to flood fill it with the foreground color you selected

tile1.gif

3. Next apply the sandstone filter to the image with the command:

Filter > Texture > Texturizer > Sandstone

In this example set Scaling=100, Relief=4 and the Light Direction=Top. Click "OK" to close the dialog and apply the texture to the image.

tile2top.gif
tile2.jpg

4. Make a new 4" x 4" RGB image at 72 pixels per inch with a white background. This image will only be used to test the tiling of a selected portion of the first image. It will not be saved.

tile3top.gif
tile3.gif

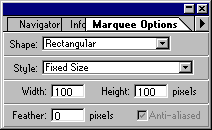
5. Click the rectangular selection tool. In the Marquee Options palette select Style=Fixed Size, Width=100 pixels, Height=100 pixels and Feather=0 pixels.

tile4.gif

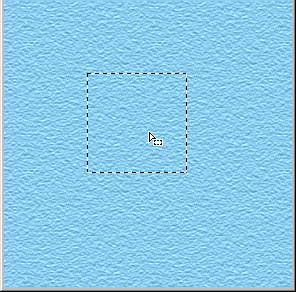
6. Click anywhere in the image area. A 100 x 100 pixel selection marquee will appear. You will be selecting an area that will serve as a pattern that fills the second image. Since the defined pattern will simply be a tile, the trick of this technique is to select as uniform an area as possible. The goal is twofold:

a) The defined area should be as uniform as possible without any distracting flaws or unusual patterns that will repeat throughout the fill.
b) The outer edges of the defined area should mate smoothly together when they are tiled, although this is not as important as a) above because the next tutorial will explain how to overcome this.

7. Using any selection tool, click inside the selection and while pressing the mouse button, drag the marquee to a suitable location

tile2top.gif
tile5.jpg

Once you have selected the area to define as a pattern, click:

Edit > Define Pattern

8. Next make sure the test image is the active window then click:

Edit > Fill

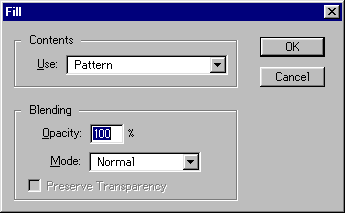
You will see the following dialog. Select:

Contents:
Use=Pattern

Blending:
Opacity=100%,
Mode=Normal.

Then click "OK" to apply the pattern fill to the image.

tile6.gif

9. Now check the results of the pattern fill on the image. Look for smears, ridges, or any uneven repeating texture picked up from the pattern definition in step 7 above. If you see any undesirable repeating pattern, simply drag the selection marquee to a new location in the TILE01.PSD file and repeat the command:

Edit > Define Pattern

Repeat steps 7 and 8 as necessary until the image is filled with a smooth, even texture.

tile3top.gif
tile2.jpg

10. Once you are satisfied with the results make the TILE01.PSD the active window and click:

Image > Crop

This will crop the image down to a 100 x 100 pixel tile.


11. Below is the finished tile. You can use it for your own backgrounds. If you are using Netscape® or Internet Explorer, simply right click on the image below and save it to disk.

tile8.jpg